March 2011 ~ birdie to be2

Thursday, March 31, 2011

On Thursdays, I am cooped up at school all day and night. Boo! But I love my classes and they keep me interested... most of the time.
Here is snap shot of some name doodles I did during lecture. At least its kinda relevant to my Typography class... right? Here are some other doodling projects I found on the web. I actually found an entire blog of doodles: Doodler Blog They are MUCH more complex and creative than mine. But at least they'll give me ideas for next week!
Baseball season has finally arrived! After last season... and the Giants taking the World Series, I have been anticipating this day for quite some time. And it doesn't hurt that we started off with a successful preseason rally against the A's:
(Sorry Bird)

Wednesday, March 30, 2011

After some super tasty treats this weekend, I thought I would post something on the healthier side. Contrary to the Jelly Belly outing, I do try to keep it pretty healthy. I just like to allow myself a little wiggle room for my oh-so-sweet tooth.

My usual breakfast consists of something cottage cheese. Not everyday, but I do love it and enjoy mixing it up with different ingredients to keep it tasty, but still nutritious.
I usually add a little yogurt to my cottage cheese. It adds some flavor and helps take the edge off the cottage cheese a bit.
This morning I also added a small banana, blueberries, and walnuts.
{Please excuse my iphone photos!}
Lastly, I added a teence of flaxseed meal. Flaxseed to anything adds a lot of nutrients and fiber.... which are both especially good for breakfast.

Cottage Yogurt Mix:
1 cup Nonfat Cottage Cheese
2 oz yogurt
1 small Banana
20 Blueberries
2 tbsp Walnut pieces
1/2 tbsp Flaxseed Meal (I use Bob's Red Mill)

The Goodness: 365 Calories, 5.3g Fiber, 24g Protein! Plus, a good serving of your Calcium and Vitamin C for the day (over 20% of each). A lot more than you can say for a bowl of Captain Crunch! Which happened to be my ultimate childhood fav!

Tuesday, March 29, 2011

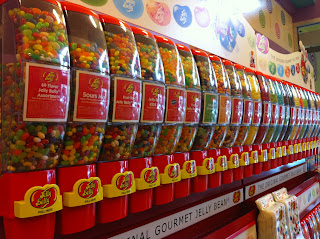
The Bird and I had a little sweet tooth this weekend between house hunting and lunch. Incidentally, we ran into a little place called Sweet Tooth. They had an overwhelming display of sweets at our disposal. Not only did they carry old fashion candy bars, sell bins of candy by weight, and have a display case of a variety of truffles, they also had frozen yogurt! It was just beautiful... and bright... and fun!

We opted for some bin candy and had some fun with mix & match. All the bright colors and yummy treats inspired me to research a few dessert tables out there, inspired by Jelly Bellys!

Friday, March 25, 2011

 Happy Friday Love Birds!

image by ello there @ Etsy

Thursday, March 24, 2011

I have just discovered Pinterest... WOW. A website dedicated to posting things you love.  As one of the subscribers, ebbyface stated:
Well said. You will fall in love like I did.  Here are a few of my favorite things:
a dream kitchen by The Lettered Cottage

a fun little piece by Paper Crafts Connection

a lovely touch by fabuluster @ Etsy
a perfect pan by Amazon

a carrie closet by Annie A.

and yes please! by Monique Lhuillier

Wednesday, March 23, 2011

Vintage anything is pretty much right up my alley. Now when you factor in typography... I'm completely over the edge in love! I have been learning so much about font and type faces. I am absolutely enamored! So I thought I would smush the two together today to create a Vintage Chic Collage of some pretty fabulous finds.

 
       1 Typesetter Plaques
                 by Ballard Designs

       2 Rubber Stamp Set
                 by Buy.com

       3 Smith-Corona Black Typewriter
                 by 2RaymondDesignCo @ Etsy

       4 Vintage Letters- alphabet set
                 by GlamDecay@ Etsy

       5 Letterpress Set Wood Type
                 by angiepea @ Etsy

       6 Pink Retro Rotary Dial Telephone
                 by OnSources.com

       7 Secret Love Letter Necklace
                 by BuenoStyle @ Etsy

       8 Vintage Letter Pillow
                 by French Laundry @ Shopstyle

Tuesday, March 22, 2011

The word on the street this Spring is Honeysuckle. How fantastic is that word! According to Refinery29, the ultimate guide to fashion, Honeysuckle pink was voted the 2011 color of the year by Pantone. So to get in the spirit, I spent my weekend in search of a Honeysuckle lookalike for my toes...
I realize I am in a little behind schedule announcing this in March. But since I had been so caught up in baking, I thought it would be a refreshing note. Plus, I cannot get enough of this color! Besides dressing up my piggies, here are a couple other accessories I came across:
 
1. Pink Peal Cluster Bracelet  by AMI designs

2. Frozen Yogurt, Ice Cream, & Sorbet Maker  by Cuisinart

3. Mezzo Open Toe Pump  by Enzo Angiolini @ Endless

4. Paisley Pillow Cover  by Jackie VonTobel

5. 2011 Canvas Pocket Agenda  by Kate Spade @ Papyrus

6. Yves Saint Laurent Allegra cashmere scarf  by Accessories

Monday, March 21, 2011

One of the main ingredients to my beloved dessert table was the brownie pops. And we had a lot of fun making them! My baking cohort for the day was my mom... I was more her assistant than anything. All I did was bring the excitement and recipes to the table (pun intended).
Here is an after shot of the pops. They were fun and added a lot to the table. I purchased the tin from Michael's and used Styrofoam inserts which kept the sticks upright.  

Here is the brownie pop recipe I followed: (Compliments of Get Off Your Butt and BAKE!)

step one: make.
I used a packaged brownie recipe. With everything else going on, I didn't get around to making the brownies from scratch. But either will work. I lined the brownie pan with parchment paper so they would not stick. The recipe calls for "moist, fudgy brownies" since it makes them easier to ball up. After theyre baked, cut off the crusts and cut the remainder into small bars. Let them cool to where they are easy to handle.

step two: mold.
If your brownies are moist and fudgy, they will cling together easily. Grease your hands to keep them from getting too sticky. Try to roll the top of the brownie into the center of your ball. The crackly top has dry edges that make it hard to make your ball nice and round.
step three: pop.
Next, I inserted the sticks into the rolled brownies. Go ahead and push them almost all the way down to the bottom. You want to make sure you don't lose your brownie ball while dipping. Let them cool completely before you start dipping them.

The next few steps are for you to use, modify, or disregard. You can decorate your brownie pops with any frosting color, sprinkle and garnish that works best.

step four: dip.
To melt the chocolate wafers, microwave in 15 second intervals stirring after each until they are smooth. Do not over do it. If you cook the chocolate it will not set up very pretty. Dip the brownie pops into the melted dark chocolate completely. We dont want to see any of the brownie. Mugs work very well for these. They are the perfect size and the thick mug holds the heat in so that the chocolate stays warm for a while. Let the chocolate set before you start dipping the pops in the white chocolate. They will no longer look shiney and will get a dull appearance when the chocolate is set up.
I used Wilton Candy Melts, but you could also find these in bulk. 

step five: re-dip.
Only dip the pops 80% of the way into the white chocolate. It looks nice to see the dark chocolate layer peeking out. Let the white chocolate set up a little bit before dipping them any sprinkles. If the chocolate is to drippy the sprinkles will drip right off your pop.

step six: sprinkle. 
Standard paper muffin liners worked well to set out all my sprinkles. Only dip them half way up the pops so you can still see the white chocolate layer. Roll them in the sprinkles if you have to. 
I only coated my pops with pink Wilton Candy Melts and white & silver sprinkles. Looking back, coating the brownies with a layer of chocolate probably would have made them sweeter and more visually appealing. I had a difficult time during the frost & sprinkle transition. My frosting kept dripping into my sprinkle cup! In the future, I would let the frosting sit for just a minute to let it harden a bit. (Just don't wait too long or your sprinkles won't stick!)

Wednesday, March 16, 2011

I had a fabulous birthday party this weekend! It makes me appreciate family and friends all over again. I enjoy times like those that remind me of one of the main reasons I moved back home.

Part of my party involved me dressing up my own dessert table. It was a first for me... hopefully of many. That alone was one of the highlights of my day. Though I knew it wouldn't turn out exactly like all the inspirational blogs I've been obsessing over, I was excited to put it together and call it my own!

I put together the cupcake pom-pom toppers, the 'Birthday' garland, and the festive pink touches. I made chocolate chip cupcakes, with cookie dough frosting and pink icing brownie pops. The dessert table was all topped off with yummy candies, pink Izzes and bubbles! Oh-my!

Friday, March 11, 2011

So yesterday was the official beginning of my birthday week! Its hard for me to understand others don't share the same birthday excitement that I do.  I love celebrating birthdays! Yes, my own... of course. But its not just mine... its the excitement, celebration and anticipation of any birthday that I cannot get enough of!

My birthday is on St Patty's Day, which is a treat all on its own. Everyone in the world is already celebrating on March 17th. I just get to join the party and have my own festivities right along side of the four-leaf clovers and green beer.
The celebrations will commence tomorrow. I have begun the decoration gathering and am preparing to design my first dessert table. There is so much inspiration online through all the blogs I follow. I'm both nervous and excited to see how mine turns out in comparison.
Here are my supplies thus far, that will hopefully turn into something festive, well put together & fun!

Wednesday, March 9, 2011

This weekend I experimented with a scrumptious recipe I found on How Sweet It Is: Chocolate Chip Cupcakes with Cookie Dough Frosting... Hello Delicious! I used to bake cupcakes fairly often, but since my beloved KitchenAid has been in storage... I have seriously been slacking!

In our house, I grew up baking chocolate chip cookies; A family tradition that was pasted down from my grandmother. So when I saw this recipe, I thought it was an absolute perfect opportunity to dust off the cupcakes pans and start mixin!


Here is the recipe:
Chocolate Chip Cupcakes
makes 12 cupcakes
1/2 cup butter
1 cup sugar
2 eggs
1 teaspoon vanilla
1 1/2 cups flour
1 teaspoon baking powder
1/2 cup milk
1 cup chocolate chips
Preheat oven to 350.

Cream butter, sugar, and eggs together until fluffy. Add vanilla.
Combine dry ingredients in a bowl. Add half of the dry ingredients, mixing until just combined. Add the milk. Once mixed, add remaining dry ingredients. Add chocolate chips and mix if you’d like them in smaller pieces.
Pour into cupcake tins and bake for 20-25 mins at 350. Let cool, then frost.

And we're off...

I did have a little help along the way... He's the perfect baking assistant with the ultimate sweet tooth!


While the cakes were baking, we whipped the frosting together. In the mixer, the cake and frosting looked very similar: Chocolate chips and lots o' butter!

The frosting recipe:
Cookie Dough Frosting
2 sticks butter, softened
1 1/2 – 2 lbs powdered sugar
1 teaspoon vanilla
1-2 tablespoons sweetened condensed milk
1/2 cup chocolate chips
Mix butter and powdered sugar together, adding sugar gradually to the mix. Add vanilla. Mix in milk, adding more if needed. Continue to add milk and sugar until it reaches the desired consistency. Mix in chocolate chips.


Like the recipe states, I continued to add both sugar and condensed milk to the frosting. I added extra for what I thought was a good consistency and also for taste. It was a little too creamy for me with the measurements listed. But its all personal preference... So mix and taste along the way til you get what you're looking for.

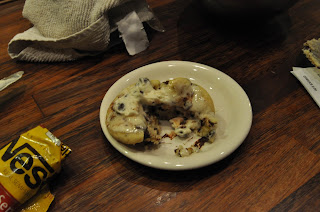
My taste testers were not about to wait for the cooling process. So we indulged on warm cupcakes and melted frosting!


They were absolutely delicious! Enjoy and thank you again to How Sweet It Is!

Happy Baking!

Friday, March 4, 2011


I have begun my second phase of school for this lifetime. I earned a degree, what seems like a 100 years ago, in Psychology. However, not only did I walk away from college jobless, I started a career in a field that absolutely was not for me. I have re-enrolled in school as an effort to 'figure it all out.' I wish someone would have told me to stay in school the first time... to do just that. But here I am, en route to class with my barest of necessities.

About Me

My photo
I love all things creative and design oriented. I am inspired by fashion, photography and typography. And especially have a soft spot for weddings, pink palettes and sparkle.
Powered by Blogger.

Copyright © birdie to be2 | Powered by Blogger
Premade Blogger Template by Berry Vary